Contact Me By Clicking "view my complete profile"

Contact Me By Clicking "view my complete profile"
Showing posts with label shechef. Show all posts

Friday, September 16, 2011

White Bread...makin it in Arizona

I have not made bread in over 4 years. That is since before i met Mr.Man. For the entirety of our relationship our local dollar stores have carried the whole grain whole wheat 7 grain breads for 99 cents...Sara Lee would simply throw the overstock to the local Dollar Trees or Big Lots. We never hesitated to buy the Sara Lee or Aunt Hattie's because it did NOT have high fructose corn syrup.

I have been extraordinarily busy the last few months but a few weeks ago I finally got off my keister and started trying out different bread recipe. The recipes that I was originally using called for the fresh yeast that I used to have in my professional kitchen and I really can't purchase that right now - it's just not worth the trip to AJ's or Whole Foods.

Also, the delivery people here have a tendency to leave things out on the dock in the heat so it's usually compromised. I figure I might as well try a few recipes out using the individual packets of yeast that I was able to purchase for pennies. I also tried "expired" yeast and current yeast. They acted the same in my opinion.


The other thing is in my work kitchens we always had a proof box or could park a rack near the dish-washing station where it would be subject to warmth and moisture - that had to be replicated in my own kitchen.

I will be doing a video on this - but I just wanted to blog this out.

The photos you see in the photo are the white bread that i made - it was my 2nd attempt. I have discovered that here in AZ you get better results doing a double rise with a 3rd rise while proofing. Proofing is when you allow it to rise in it's final form with controlled temps and moisture. This can be achieved by proofing in the oven with a pan underneath with hot water - this warms the oven and locks in moisture.

My first attempts were as hard as king Arthur style yeasted breads. The yeasted quick breads like those in Northern Europe. What I was aiming for was the familiar fluffiness of American Style Breads without the sugar. I finally got it after trying a recipe provided by SciFiChick...it is an Amish White Bread recipe.

Recipe:

2 1/4 c warm water (110 degrees F)
1/3 c sugar
1 1/2 tsp active dry yeast
1 1/2 Tbsp salt
1/4 c oil
5 1/4 c bread flour


I know that most people do theirs on the counter I do mine in the bowl. I have very large stainless bowls and in my opinion this just keeps everything cleaner and I'm used to eyeballing it so I know exactly when it doubles.

  • Mix the sugar, yeast and warm water in a bowl - allow it to foam. Mine took 20+ minutes to get a nice foam on it.
  • Mix salt and oil into yeast. Add Flour 1cup at a time until incorporated
  • Allow dough to be sticky to the touch like cookie dough
  • Knead until smooth (8-10 minutes), Cover with cloth and allow to double (60-90 mins)
  • Grease 2 loaf pans and set aside
  • Punch down, knead 2 minutes, allow to double again (60-90 mins)
  • Punch down and divide in 2 equal parts
  • Knead in a flat circle, folding under and shaping into loaf
  • Place dough in loafpans, brush with eggwash and sprinkle with sesame seeds
  • Place loaf pans in oven
  • Place a roasting pan on rack under the loafpans - fill with 5 cups of boiling water, shut oven and allow to rise 2 inches above loaf pan. Do not overproof or your loaves will DEFLATE. I wait about 30 minutes then throw out the water and put another 5 cups in.
  • Once dough bounces back it is ready to bake
  • Heat oven to 375 with loaves in there
  • Bake for 25 minutes after the oven is at temp
  • Remove from heat - cool on racks
Some people just leave it for 10-30 minutes and then put it up - I allow mine to rest overnight. I know it sounds like a painstaking process - but if you want it to be all fluffy and happy like wonderbread this is how I do it in the desert. Also - I started sneaking those little plastic bags they leave by the meat counter and that's what I put my bread in. Every time I go shopping I just yank 3-4 of those bags and leave them in a drawer.

Whole wheat bread coming soon Also!

Happy Baking and Please let me know if you have any questions.

Monday, September 12, 2011

Chicken Wings: Lemon Parmesan & Buffalo!

I made another cooking video!
chicken wings! < click here


Some people say that the chicken doesn't matter it's the sauce that matters...in OUR house the chicken does matter because sometimes people just like their wings plain and extra well.

I learned this recipe from Momma In Law...My mom (Mom1) has always made her chicken without any breading or flour - Momma in Law makes hers floured - she not only marinates the chicken but she also seasons the flour and I think it makes a big difference. I must admit that I only measure the ingredients loosely. Feel free to adjust it to taste - some days I put more herbs and some days I put less. Also note that whole wheat flour is not as clingy or thick as all purpose flour - so if you want it to be real crispy style you might dip your chicken in buttermilk and then use all purpose flour.

Have fun, be safe and be careful frying is dangerous!

2 lbs chicken wings

chicken seasoning
1 tbsp salt
1 tbsp creole seasoning
1 tsp oregano
4 tbsp lemon juice
1 tbsp paprika
1 tbsp lemon pepper

marinate 1 hr or up to overnight


flour base
ziploc bag
handful cornflour
2 cups all purpose flour
3 tbsp cornstarch
1 tbsp garlic powder
4 shakes paprika
1 tbsp salt
1 tsp basil
1 tbsp chili powder
4 tbsp dried parsley

6 cups corn or vegetable oil for frying

---

"buffalo sauce"
4 Tbsp butter
1 tbsp olive oil
1 tbsp vinegar
1 tbsp sri ra cha (aka rooster sauce)
5 tablespoons hot sauce
pinch of salt - or to taste

optional
3 tbsp honey
1 tsp molasses
1 tbsp whiskey or bourbon

"lemon parmesan garlic sauce"
1/4 cup lemon or lime juice
1 tbsp fresh garlic
2 tbsp butter
2 tbsp parmesan cheese
PLUS sprinkle parmesan before serving
1 tsp red chili flake

optional
1 tbsp tequila
2 tbsp garlic powder
1 tbsp lemon pepper
---
Please just taste them before you drop your wings in there - adjust it as strong or as mild as you like...this is just to show you the method for preparing and serving barstyle wings in your home.


IF YOU'D LIKE ADDITIONAL FLAVORINGS LET ME KNOW - I CAN PULL SOMETHING OUT OF THIS BRAIN OF MINE :)

Friday, September 9, 2011

Cilantro Lime Rice & Tacos --- in 20 minutes!

I MADE A COOKING VIDEO!! hee hee.

As long as I have been cooking I have never recorded a video of myself cooking, my friend Gya was prone to taking video but she's always done that at all events.

Part 1 & Part 2 -- click here to watch
Please rate and subscribe ok?

The videos I made were pretty much live time with a few pauses for when the water was boiling. Waiting for water to simmer is like watching yourself lose weight...it ain't happening. I even did the food preps live so people have a real time understanding of what it takes. Always start the rice first and get that past boil and then start the tacos - Start to finish it shouldn't take more than 20-30 minutes to get dinner on the table.

cilantro lime rice ingredients

1/2 bunch cilantro (reserve 1/3)
1/2 white onion
3 cups rice
1 tbsp garlic or 4 cloves minced
1 tsp red chili flake
2 tsp basil
1 bouillon (1c water) or 2 pints chicken broth
4 tbsp cooking oil
6 cups water
1 shotglass lime juice (3 if you like it tart)
2 tbsp salt

Rice is so flexible you can eat it in all ways including dessert. This is just one more way to make rice --- my cooking errs on the side of less salt, feel free to add more. If you like it spicy throw in a jalapeno into the saute, if you want it more fragrant use jasmine with a pinch of saffron flowers, if you want it dirty add chicken or beef to it while it simmers. My one brother likes it with a LOT of cilantro so when he's over I use 1 1/2 bunches of cilantro. It's very flexible, just adjust it to how your house likes it.

Tacos are a twice a week staple in this house. I pretty much make these on the fly and no two times are ever the same because I rarely measure - especially if I cook it 5lbs at a time. So if I email you a recipe it may vary from this one but it's all the same range. With dryer meats I add a small can of tomato sauce, if I use the home canned meats I do not add tomato sauce because there is additional liquid in the jars.

taco meat ingredients

2 tbsp garlic or 7 cloves minced
1/2 white onion
3 tbsp oregano
1 tbsp basil
4 shakes cumin
1 tbsp chacheres
4 tbsp cooking oil
1 pint canned ground beef OR
1.5 lbs raw ground beef
4 tbsp new Mexico chili powder

tortillas
shredded cheese
lettuce, cilantro, tomato sliced
salsa

---

Almost all of this can be made from preps as long as you have masa harina mix (or make your own) if you have the canned meat, dehydrated onion, garlic and herbs but instead of lettuce you could use rehydrated cabbage in a loose chop with a bit of lime juice!

Happy Eating!

Saturday, August 27, 2011

Canning: Ham, raw pack

Ham is LOW ACID and must be pressure canned. Be safe and Be sanitary.

Ham was on sale this week $1.27 /lb. Still not as good as the sale prices on major holidays but not bad at all. Truthfully it was one of the few edible items worth buying this week.


I selected the bigger of the two (10 lbs) and decided I wanted to try something a little different.


I dug my cutters out of the drawer and found one that fit the inside of the 1 pint wide mouth. I wanted to do sliced rounds a little short of an inch. Since they shrink a bit after canning I figure a round would be good on a biscuit or under a poached egg for eggs benedict.


First I washed the canner, the utensils, the lids and caps and washed the jars and filled them with hot water.


Next I filled the canner to the 2nd water line and added a splash of vinegar.


Next you line up your utensils and rack with towel on it. Some people just lay a big towel on the counter - that is fine too.


Then I rest the jars in the water and turn it to medium and cover (not close) the lid.


While the water is reaching temperature I start trimming the ham. I did NOT cook the ham this is simply my preference because I feel the pressure canning process is sufficient enough. I take care to cut out the rounds where I can and trim off as much fat and gristle as I can.


I cut the bottomout first to determine where the bone is.


I broke the ham down into 3 different ways:
sliced rounds - sandwhiches
long slices - stirfry or sautes
chunks - salads, fried rice or with crackers

This cut did not have much waste. It was just a small cereal bowl full of waste. I reserved the skin and bone for broth.

Once the meat is prepared start the broth.


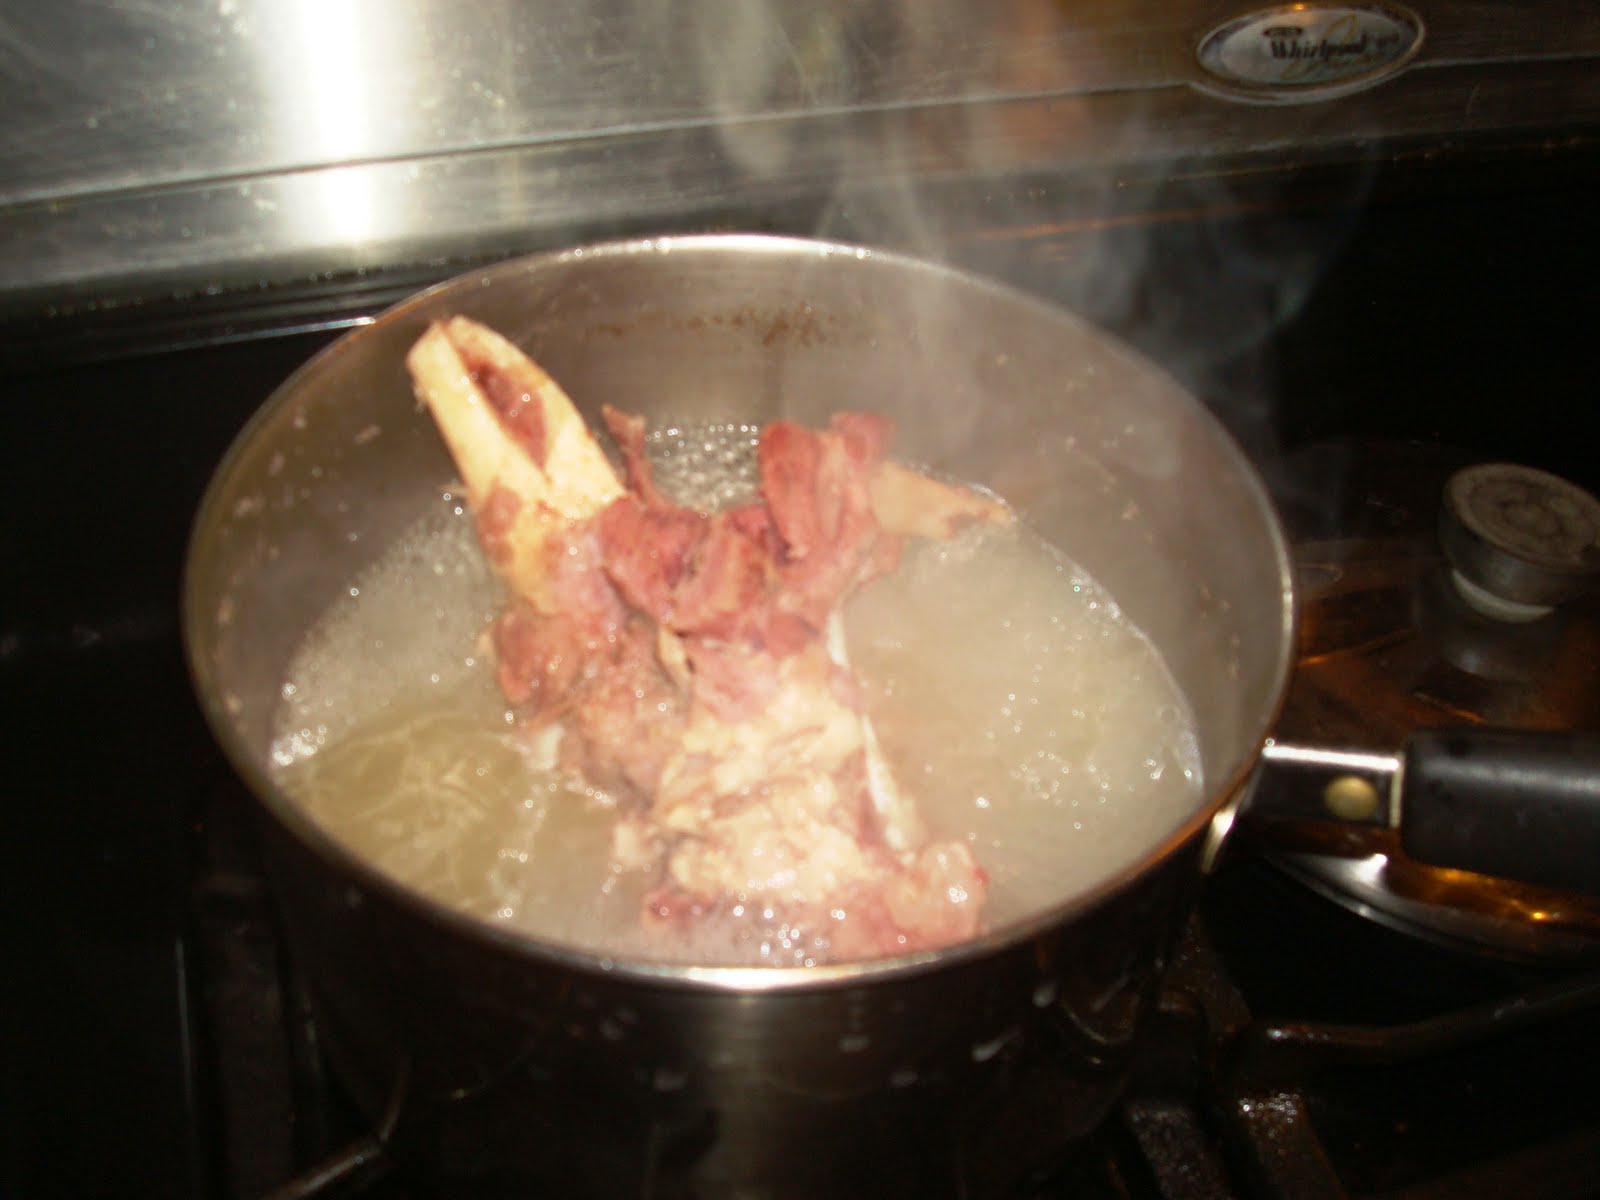
I just covered the meaty part of the bone with filtered water and added a touch of pepper a few slivers of onion and a stalk of celery. I let that boil hard for at least 20 minutes


Once the broth looked like it had reached a good colorful level I started removing the jars from the canner. And poured it onto the lids and caps.


Then I lined up the hot empty jars on the towel.


I started with the sliced rounds, then moved to the slices and then finally the chunks. I did it in this order because if there is additional space you can use the chunks to fill them.

Meats should go to the 1 inch mark.

Once filled I put a pinch of red hot chili flakes and parsley on the top of each pile. That is for both color and flavor.


I slowly ladled broth onto each bottle 1 ladle at a time.


The sliced rounds are very snug. So I used a narrow chopstick to move the meat and burp the bubbles. You will have to lift it slightly to get the air out from in between the rounds.


The sliced ham and chopped ham could be burped with a mini spatula. Once you have burped it make sure that you cover it with liquid to the 1 inch mark.


Due to the fat content I made sure to wipe it THRICE rinsing the towel every 2nd bottle.


Use the magnetic lifter to pick up the lids. Line it up with the mouth of the jar.


I hold the lid down while i put on the cap.
Tighten it finger-tight.


Carefully place them in the canner.


Close the lid centering the arrows.
Turn the heat to high.


Once the nipple pops vent for 10 minutes.


After venting pop the weight on - if you use a gauged pressure canner just wait for your pressure to hit 11 (or whatever is suggested for your residential altitude) and start timing

Pints: 75 minutes
Quarts: 90 minutes


Start the timer from the point it starts JIGGLING/DANCING. I leave my stove on high heat, but some people turn it down just enough to maintain the jiggle. I don't, I won't play Russian roulette with food poisoning yanno?

Once the time is up turn off the heat and wait for the nipple to deflate. Do not touch the weight (jiggler). Do not touch the nipple. Be patient you will know once it stops.

Be careful, it's super hot!

I know I overcooked mine a bit because I fell asleep while it was venting. But it didn't dry out - The next morning I removed the caps and scrubbed down the lids and bottles. I must admit these are some of the better seals I've had.


Canning Ham made me very nervous and I was watching it and listening for strange noises but they came out all right.

10 lbs made a tightly stuffed 8 pints.

Once everything is dry I label everything and date it. I even put ham rounds, ham sliced, ham chunks - so if I have to send Mr.Man to the food room then he will know what to get!

It's just easier that way.

I will do the 8 pound ham tomorrow as well as some ham broth for soups.

Keep it Poppin' Keep it Choppin!

End of August Haul...I'm pooped

Jars...the blessing and bane of a canning junkies existence. I checked out craigslist and there was a lady 2 exits from here selling 7 jars for 2.50 lol. 2 quarts, 5 pints and 2 ball glasses with lids. Sweet Lady...

Quite a deal but they are getting harder and harder to come by.


My sister wanted to go on a shopping mission and we had to bring one of the dogs to the vet for a checkup. I found this at ross hidden in the plates. Really weird. It used to be 14.99 but I managed to find it on clearance for 5.99.


Crazy right...it's an LED wind up light. I minute of winding will give you 20 minutes of light. It works I tested it. Pretty easy to use - has 3 brightness settings and a hook to hang it and a rubberized bottom so it doesn't "slip."

We needed one but I figured that it would be handy for prepper stock - camping stuff I guess. I'm not really hip to the camping - camping to me is a hotel without a concierge so this will be interesting. HAHAHA.
We decided to kill time and stay on the same side of town as the vet to conserve gas. L'il sis suggested we go to Target bc bathing suits should be 75% off by now. They really weren't but I found this 8 pc water bath canner set for 14.98 it was half off!
Someone said that's an "OK" deal. Hahahaha really? Coz the last time I checked the price of the canner alone is $15.


I like how it has the basket and the extra funnel and magnet. I must admit I already extra accessories stored for the canning such as funnels, jar lifters, hundreds of lids and all that because I know the price is only going up and because I know that I'll be a canner for as long as I can do it it's not a passing fancy yanno?


Albertsons had the shank Ham for 1.27 and butt ham for 1.47. I opted to get the shank so that I could boil it out and make ham stock for pork and beans or ham and pea soup.


Target had Mr. Mans favorite body soap 2 for 5 and Albertsons had the wine on super sale.

Since we are comfortable at the level of preps we have this is the stage in the game where we take advantage of sales and incorporate them into our preps. I don't know how much liquor people incorporate into their preps but we do at least once a month add a few bottles.


The wine is red rock Merlot and some organic Chilean red, carmenere i think. The wine was about 75% off. I'm not really a wine fan but Mr.Man definitely is. So at these prices it's kind of ridiculous not to buy them.

Funny how when stores renovate here they put everything on clearance and then restock.


Bread Pans for baking. I currently have 4 but I decided to pop into the Ross and see if they had anymore of the Nordic Ware USA made steel pans I like - they didn't have those but they had these king Arthur flour brand ones. Also made in the US and stainless steel.


I think they were like 6.50. Some people pay as much as 12 bucks for made in china ones with crappy teflon. Yuckers.


Others prefer to bake their bread in glassware (aka Pyrex) I've personally never baked any kind of bread in glassware but I think I'll give it a whirl now.

I always used my Pyrex short dishes for vegetable terrine and couple size lasagna :)


While in Target I also stopped by to look at the clearance along the ends...and found Colgate toothpaste $1.38 for 8 oz plus free toothbrush. I picked up 10 of them. I really could have picked up a lot more but we already have a lot in storage. What a steal.


Last stop was dollar tree because it was right next to the vet. I picked up cloves, whole milk and half and half (shelf stable best by date is Feb 2012). Lemon extract (ingredients lemon, oil, alcohol). And a backup tripod for the camera so when I start doing cooking demos.


I almost forgot to mention at target they also had the Ball Blue Books on clearance for 3.62. I already have one but this is just in case I destroy mine.


Dollar tree also had these intruder alert trip wire things for the doors, generic neosporin and extra batteries for the trip alarms. As you know everything is a dollar.


Today I was able to find natural (unbleached) parchment paper for 2.99. Glitter sprinkles for cupcakes (2.49) - not really a prepping item but nice to put up since Christmas is right around the corner - and I found that Albertsons grocery carries junket rennet - So I will be able to make an attempt to make cheese!!!


My brother also hooked me up with this Portuguese coffee for only $12.99 - it sounds like a LOT but actually it's over a kilo of whole bean coffee. I don't think it can be beat. Chocolate Traditional Roast - Organic. LOL.


Finally, he also got me this manual coffee/grain grinder. It only does 1 cup at a time but it doesn't hurt to have it - it's made out of beech and brass.

It's been busy around here because I already canned half of the ham and organized the house and cooked dinner and blah blah.

It never ends.

Wednesday, August 24, 2011

Deals of the Day...

I realized Mom had given me some plastic bags for a vac sealer that is not a food saver and the food saver would not take the thinness of those bags. So I went to return them to big lots. I didn't have a receipt so I told the guy I would just take an exchange he said ok - I turned around and don't you know - Liquid Pectin is on sale.


2 pack of certo sure jell. 25 cents. Expires Sept 2012. Some of them expire next month, most of them don't. I bought the expired ones too - I"m going to try canning some jam with them and test this theory that it doesn't work after expiration. We'll see. 58 boxes HA HA.

See...the same thing goes for yeast and baking powder - so as it ages you just increase ingredient. I'll let you know how it goes in December.


7 oz sockeye salmon was only 99 cents. Expires 2014. It's not the 15.4 oz can that I like but it's also not the paltry 5 oz that most stores have. It's a win because red salmon is better than chicken of the sea brand.


I had a 10 dollar credit - and I saw these 16 pc bungee cords and 10 pc rubber tarp straps. It sounded like a good deal and we didn't have either of them.

I showed them to Mr.Man and said here you go Man Stuff. He said How do you use these tarp straps. I said I dunno. He laughed and asked why did you get it then? I said "because it looks prepperish and useful..." Then we both laughed.


My baby spatula is looking beat so I went around looking for some type of replacement. The paula deen ones were only 1.97, the 2 rubber ones were 99 cents. I even found a mini tripod for $1 since I'm going to start making cooking videos.

Weird to say that.

I'm so pooped but I just had to put this up real quick so I can sleep in a bit tomorrow and then put up 2 slide shows on my youtube.