If you scratch the process of canning - you can just eat as is. But sine we love that Asian Flavor we have incorporated it into our food stores. We chanced upon boneless skinless thighs (99cents a lb) and in my opinion thighs are better for sauced or grilled recipes because it is dark meat. I decided to try half into chicken teriyaki and the other half into saute (that's another blog - Chayote Chicken). For over a decade I've been making my own teriyaki sauce so increasing it is no big deal.
This makes 5 quarts and leaves about a bowl for you to eat :)
Ingredients:
Boneless Chicken - 12-13 lbs
season with salt pepper paprika and garlic powder.
grill and set aside covered so it rests
Teriyaki Sauce
2 cups soy sauce
10 cups water
2 Tbsp ground ginger - or 4 Tbsp fresh chopped ginger
2 tsp garlic powder
3 c brown sugar
1/2 c honey
4 Tbsp black pepper

I simmered it the night before and let it rest so it could mature a bit. I adjusted it a bit with some pepper and soysauce until it had the zip i like.

Mr. Man grilled the chicken on mesquite the night before - I just left it in the dutch oval and left it in the fridge.

Simmer your teriyaki "sauce" and start to chop the chicken. I do this so I get everything super hot because when I first started canning (and i AM still learning) i would leave the jars and water too cold and some of my seals failed. Chop the chicken in hefty strips. Put back in pot and set aside. Now you ask why did you grill it if you are going to can it. 1) I wanted to give the chicken some strength so when we eat it later it will have a good bite. 2) That smoky mesquite flavor tastes good.
Now wash your jars and such

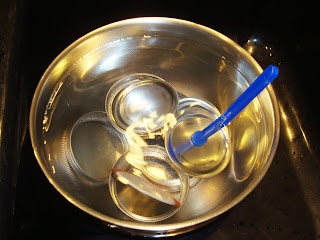
I set the lids and caps in HOT water. At this point I also fill the pressure canner with hot water and leave it on high.

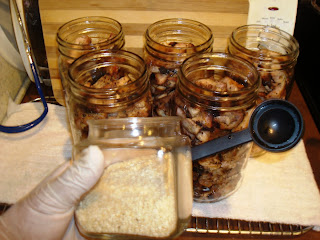
Fill the bottles with the chopped chicken to the 1 inch level.

Once it looks like 1 inch top each bottle with 1 teaspoon roasted sesame seeds

Then divide the teriyaki "sauce" evenly between the 5 bottles. With the sauce that I made it came to about 2 inches from the top. Then run a plastic spatula down the sides to burp the airbubbles and push the center a bit to level it - but don't overstuff it.
So I bet you are asking why didn't I make enough sauce to go to the 1 inch mark. Well because the sauce will require thickening at the time you eat it. You'll see where this is going.

So then fill the jars to 1 inch with boiling hot water and nudge it down 1 more time with the rubber spatula to make sure there are no gaps and spaces.

I take a paper towel and wet it with water and a bit of vinegar.
Wipe off the sides rotating your paper towel around.

They look pretty promising. I think it would be safe to say this could feed 3-4 adults.

I pop the jars into the pressure canner and use the same timing and pressure as stew or soup.
According to the book for us it's 1hr 15min at 10lbs of pressure.

I am waiting for the processing to finish while I write.
Let's address the issue of thickening the sauce once you eat it.
Here's how you do it.
Open Canned Teriyaki Chicken.
Drain Chicken RESERVING liquid from mason jar
Heat Chicken gently since it will be pretty soft.
Make a Slurry - 1 tbsp cornstarch and about 1/4 cup water

Mix very well by whisk or hand

Boil the teriyaki "sauce" from the canned chicken.
Whisk in the Slurry and mix hard until it is shiny and clear.

It should have the same texture as a ham glaze.

Top hot rice with Chicken and then spoon teriyaki glaze over the chicken.
Top with green onions and veggies.

It's pretty easy. Just futz with the recipe a bit to get what you want.
Oh, and email me if you have any questions.
This is really good! My wife and I made it and added fresh broccoli and carrots to it.
ReplyDeleteFantastic! I'm so happy you liked it
ReplyDeleteAre you able to just can the sauce and not add the meat? If so, how long would I process it?
ReplyDelete